27 Golden Rules For Becoming a Master Traveler

nomadic matt's golden rules of travel
Updated: 9/2/2019 | September 2nd, 2019

Every industry has its own “best practices” — proven rules and standards that guide the industry and the people in it. Travel is no different. There are many “rules to live by” that can help us navigate the unknown world with fewer mistakes.

I have my own golden travel rules.

Over the past ten years, I’ve learned a lot of tips and tricks that have helped me thrive when I travel. When I first set out in 2006, I made a lot of mistakes. (Ok, I still make some mistakes.)

And that’s not a bad thing. If you don’t make mistakes, you aren’t trying new things and pushing yourself out of your comfort zone.

Mistakes are going to happen.

But, over the years, I’ve developed a list of 27 golden rules for travel. These guidelines help me save money, make friends, stay safe, and fit into the local culture.

If you follow them, you’ll become a master traveler, able to travel the world with swashbuckling zeal and expert ninja-like knowledge… all without breaking the bank so you can keep cutting a path forward through the world for longer:

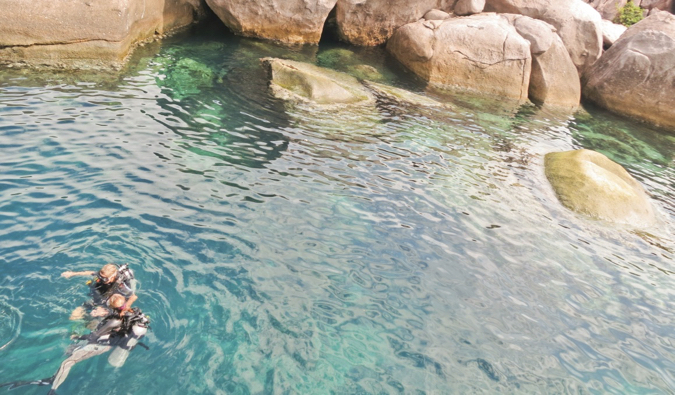
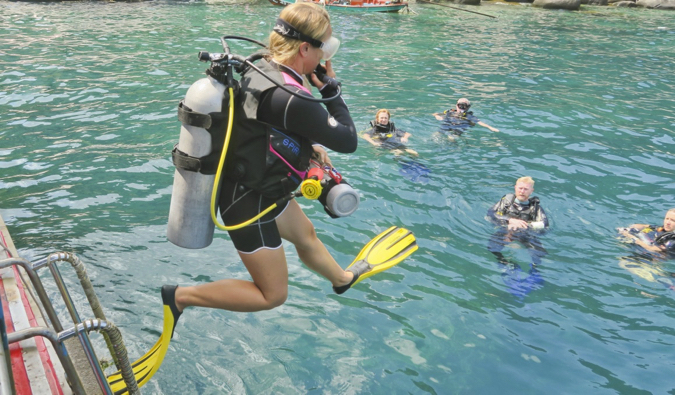
1. Be adventurous – You only live once. You’re going to get chances to do wild things you’ve never dreamed of doing when you travel. Don’t hold back. Count to three, say “screw it,” and take the leap. You didn’t come this far for nothing. Say yes when someone asks you to go rock climbing, salsa dancing, spelunking, or try the world’s hottest pepper despite not liking spicy food.

There’s no one around to judge you. No one cares what you do. No rumors will be spread. Push yourself to do something new and daring at least one.

2. Get a no-fee ATM card – Why give your money to the banks? Get an ATM card that doesn’t charge any fees and use that extra money for more traveling. Over the long term those $2-5 charges really add up. I use Charles Schwab as my bank, but you can also find many others that offer no-fee accounts — or use a one that is part of the Global ATM Alliance, and pay no fees within that network.

This article can show you how to avoid bank fees when you travel (and will give you a list of suggested cards too).

3. Get a rewards credit card – Why pay for travel when you can get it for free? Use a travel rewards credit card to earn points and miles that can be redeemed for free travel.

You’re already spending the money anyway so why not get rewarded for it?

Travel credit cards come with tons of perks and huge bonuses that can be redeemed for free flights right away. Plus, they get you the best exchange rate on your purchases.

Having one is an absolute must.

Want to know how I get hundreds of thousands of points per year and fly for free? Sign up for my free primer on the art of travel hacking and I’ll show you.

4. Always carry backups – Always carry a backup bank and credit card in case one is lost, stolen, or hacked. That way while you are fixing the issue, you still have access to your money. Instead of the problem crippling your trip, it merely is an annoyance. This has happened to me before and, I can ensure you, you’ll be thankful you followed this advice!

5. Only carry what you need – When you leave to go out for the day, only care the cash you need and one credit card. You don’t want to get robbed and lose everything. Leave the backups and extra locked back at your hostel!

6. Join a frequent flier program – Get rewarded for all of those flights you’ll be taking by joining a frequent flier program. That way you’ll earn miles, perks for flying, and free flights. Miles are like money — and you wouldn’t waste money, would you? No! So, sign up for a loyalty program, and collect points. Even if it takes you years to get a free flight, at least you are not being wasteful!

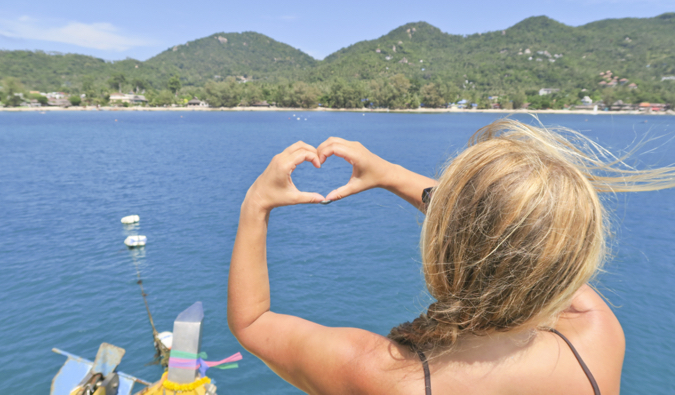
7. Travel alone at least once – Few things are as liberating as solo travel. As a solo traveler, you’re free to do whatever you want. When you travel solo, the world is your oyster. You’re free to do whatever you want, whenever you want. To me, it’s the purest sense of freedom there is.

But beyond that sense of freedom, solo travel actually teaches you a lot about yourself. Travel is an amazing personal development tool after all, and solo travel is one of the best ways to learn and grow and challenge yourself.

Without anyone around you, you have to solve the problems you face on the road. You have to figure out how to get from point A to B, deal with people who speak a different language, get comfortable eating alone, find things to do, and work out problems that arise. It’s you and your wits. That forces you to grow in ways you won’t in the comfort of your home or with a group.

While it won’t be for everyone, I still encourage everyone to try solo travel at least once. Even if you don’t love it, you’ll learn a ton about yourself in the process.

8. Learn basic phrases – Locals don’t expect you to be an expert in the local language, but learning a few basic phrases will go a long way to endearing you and making them go the extra mile for you. It will bring a smile to their face that you tried! “Hello,” “how are you?” and “thank you” go a long, long way no matter where you go.

9. Stay in hostels – Get to know other travelers and experience the communal spirit of traveling by staying in hostels a few times. They aren’t all the dirty party places you see in movies. Most hostels are very clean, offer breakfast, have comfy beds and Wi-Fi, organize events, and know the local area very well. They also aren’t just for young backpackers; you’ll find people of all ages (and even some families) staying there. Try them out. You may like it.

Here is a list of the best hostels in the world to get you started!

10. Use tourist boards – Local tourist offices are a wealth of knowledge. When you get to a new destination, visit the tourist office and ask the staff an insane number of questions about the place. They exist solely to help you get the most of your visit and it’s their job to know everything and everything about a place. Plus, they often have tons of discounts not found anywhere else.

Visiting one is often one of the first things I do in a new city.

11. Try new foods – Culture is often best experienced through food. Don’t be afraid to try new things. Get out of your comfort zone and experiment. You might actually like it (those fried caterpillars in Zambia were delicious!).

12. Be flexible with your plans – Travel is a series of happy accidents with way leading to way. Don’t skip going to that random city with the friends you just met because your itinerary says something different. You’ll regret it.

Go with the flow and be open to new things.

This will make your travels a lot more stress-free.

12. Pack light – Take it from a former over-packer: you never need half the stuff you take. Put everything you think you need in a pile and then remove half of it. The lighter you travel, the easier you travel.

Here’s our suggested packing lists:

14. Take extra money – Something always happens that you never planned for that will cost you extra money. I never thought I would fly last-minute to Fiji, need to replace my camera in Italy, or buy an extra iPhone cable in Australia. Always take extra money just in case. You may not need it, but you don’t want to be without a little extra when something bad happens.

When you start planning for your trip, set aside a $300-500 emergency slush fund in for accidents.

15. Get lost – Meander through a new city without a map. Get lost — because in the end, you aren’t really getting lost, you’re just discovering new experiences. So put down the map and wander. Eventually, you’ll find your way.

16. Call home – Your parents miss you. Don’t forget to call and say hello.

17. Get a phone — It will be easier to stay in touch with friends (and call home), meet up with other travelers, and contact hostels with a phone. SIM cards and prepaid phones are cheap, so there’s no excuse not to stay connected.

But don’t be glued to your phone. I see too many people hooked on their phone these days. But it is still a good idea to carry one for emergencies, especially when they are so accessible and affordable now.

18. Travel slow – This isn’t a race or a competition. I know you want to get a lot in with your limited time, but you see a lot more when you see a lot less. Travel slow and experience each place. Don’t race from train station to station; that will set you up for a stressful, unenjoyable time. With travel, less is more.

19. Live somewhere once – Stop at least once. Get to know a place. Learn the language. Make local friends. Explore. Become the local. Living in a foreign place gives you a different perspective on life and a real sense of what it’s like to be an outsider.

Plus, living a foreign place and surviving will help you gain a lot of confidence.

20. Avoid taxis – They just cost a lot. Don’t use them unless you don’t have any other option.

21. Bring a reusable water bottle – Not only are all those disposable plastic water bottles bad for the environment but the cost adds up over time. A water bottle here, a water bottle there, and you’ve spent $50 on water alone. Get a reusable bottle and drink the tap water in conjunction with a SteriPen or LifeStraw water purifier.

22. Buy travel insurance – You never know what could happen on the road — but something always does. I’ve had to deal with lost baggage, broken gear, delayed flights, and even some pretty serious injuries. Without travel insurance, I would have not only had to pay out of pocket for these expenses but I would have been left to navigate them alone.

Buy travel insurance so that if you’re injured or you break your camera, you’re covered. Plus, you’re friends and family will be able to relax knowing that, should something happen, you’re covered. It’s only a few dollars a day. It’s worth the peace of mind.

Here’s the link to our resource page with all our articles on the subject!

23. Bring basic first-aid – Cuts and scrapes happen, and you can get what you need most anywhere in the world, but it’s still good to carry bandages, antibacterial cream, and some hydrocortisone cream in your first aid kit just in case. Also, carry duct tape — you’ll never know when it’ll come in handy.

Here are some tips on how to pack a suggested first add kit.

24. Get off the beaten path London, Paris, and the temples of Kyoto are all amazing for a reason, but get off the beaten path, go away from the crowds, and explore on your own. Find something new, stick out, meet the locals, and discover. The road less traveled is usually a good one.

25. Take photos of your friends – Years from now, you’ll want to look back at your younger self and see all the people who changed your life. Nostalgia can be a wonderful thing. Make sure you take photos of your friends. You’ll want them later.

26. Use the sharing economy – The rise of the sharing economy has made backpacking so much easier and cheaper. From ridesharing, house sharing, and meetup websites, there are so many ways you can get off the tourist trail and experience day-to-day life with locals! Here are some suggested websites:

  • Couchsurfing (free shared accommodation with locals)
  • Airbnb (paid accommodation with locals)
  • BlaBlaCar (rideshare app)
  • EatWith (share a meal with local cooks)
  • Vayable (for finding local tours and activities)

And finally, the most important tip of them all….

27. Ignore all my tips and do whatever you want – It’s your trip. Go where you want, when you want, and for how long you want. Don’t worry about this or that. Make mistakes. Learn. Make more mistakes. Have fun and become a better traveler. At the end of the day, you won’t look back and think “if only I had more miles” but instead “damn, that was a lot of fun.”

So get out there and have some fun!

You deserve it.

How to Travel the World on $50 a Day

how to travel the world on $50 a dayMy New York Times best-selling paperback guide to world travel will teach you how to master the art of travel save money, get off the beaten path, and have a more local, richer travel experiences. It will teach you everything you need to know about travel!

Click here to learn more about the book and how you can start reading it today!

Book Your Trip: Logistical Tips and Tricks

Book Your Flight
Find a cheap flight by using Skyscanner or Momondo. They are my two favorite search engines because they search websites and airlines around the globe so you always know no stone is left unturned.

Book Your Accommodation
You can book your hostel with Hostelworld as they have the largest inventory. If you want to stay somewhere other than a hostel, use Booking.com as they consistently return the cheapest rates for guesthouses and cheap hotels. I use them all the time.

Don’t Forget Travel Insurance
Travel insurance will protect you against illness, injury, theft, and cancellations. It’s comprehensive protection in case anything goes wrong. I never go on a trip without it as I’ve had to use it many times in the past. I’ve been using World Nomads for ten years. My favorite companies that offer the best service and value are:

Looking for the best companies to save money with?
Check out my resource page for the best companies to use when you travel! I list all the ones I use to save money when I travel – and that will save you time and money too!

12 Ways to Be Prepared for Anything While Traveling

be prepared like a boy scout
Updated: 9/2/2019 | September 2nd, 2019

When I was a kid, I was a Boy Scout. I made it pretty far too, but then I became a teenager, decided it was “lame,” and quit. As a Boy Scout, I learned how to tie knots, camp outdoors, be a good citizen, play with knives, and got to have cool sleepovers.

One of the most important things you learn as a Boy Scout is their motto to always “be prepared,” and as I’ve grown up and traveled the world, I’ve found this to also be a travel truism.

You never know what might happen on the road.

Stepping out your door into the unknown is what makes travel so exciting. Each day brings endless possibility, but that possibility is for both good and bad. You may end up enjoying a day sightseeing in Paris — or getting robbed in Berlin. You may spend an amazing day on the beaches of Thailand — or suffer food poisoning in Costa Rica.

But if you’re prepared, you’ll be able to face whatever happens to you on the road:

1. Take Multipurpose Gear

Packing multiuse gear ensures you can easily adjust to changing conditions and helps reduce the amount of clothing you need to take. For example, I like pants that zip off into shorts, walking shoes that look nice enough for an evening out, and using my swim trunks as a pair of shorts. This saves room in my bag while money since I don’t need to buy as much stuff. This always ensures you are dressed for any occasion (after all, who knows when you’ll suddenly find yourself invited to party?!).

Here are some posts on gear that can help you:

2. Carry a Small First Aid Kit

While we live in 2019, not 1919, and you can find modern medicine anywhere in the world, I always carry a small first aid kit with me with a few essential items to be safe. I take Tylenol, stomach illness medicine, eyedrops, Band-Aids, scissors, hydrocortisone cream, antibacterial ointment, and a small supply of doctor-approved antibiotics. I’m usually able to find a pharmacy when I need one, but in case of an emergency, it’s good to have these items handy.

Here’s a detailed guide on putting together a first aid kit.

(And, on a similar note, here are 10 ways to avoid getting sick on the road.)

3. Pack a Small Flashlight

You’d be surprised how many travelers don’t carry one, but a flashlight will prove to be invaluable when you suddenly decide to go caving in Panama, when your hike lasts longer than expected and nightfall sets in, or when the electricity goes out unexpectedly, which is not uncommon in a lot of places. I carry a small, waterproof pen flashlight when I travel.

4. Carry a Reusable Water Bottle (with a Filter)

Water is life, and while it’s unlikely you’re going to be lost out in a desert or the jungle, it always pays to be prepared. Carrying a reusable water bottle and filter will not only save you money as a traveler, but it will also prevent tons of single-use plastic from ending up in landfills or the ocean. And yes, should an emergency arise you’ll be prepared. Most people can survive for 3 weeks without food — but you’ll only make it 3 days without water. Never leave home without a reusable bottle and filter, such as a SteriPen or LifeStraw.

5. Learn Basic Phrases

Locals don’t expect you to be an expert in their language, but knowing how to say “hello,” “goodbye,” and “thank you” go a long way in endearing yourself to locals. After all, wouldn’t you be annoyed if someone came to your home and expected you to know their language?

Knowing a few key phrases will not only make interactions easier, but it will also help you when you bargain for goods, order food, get lost, or need help.

Lonely Planet makes excellent pocket language guides for just about every language spoken, and Benny Lewis wrote this excellent guide on learning languages.

6. Study Nonverbal Communication

Most people interact using both verbal and nonverbal communication, so paying attention to facial expressions can help you appropriately read a situation, even if you don’t understand the verbal part. When you don’t know the language or might take words out of context, keep calm and take a moment to read the feelings of the person. This has helped me defuse tense situations with taxi drivers, vendors, and hotel owners. Understanding nonverbal communication doesn’t happen overnight. It takes practice, but these websites offer:

7. Keep Emergency Cash with You

While there is almost always an ATM around these days, you never know when emergency cash might come in handy. You could end up in an airport (like I recently did) and find that none of your ATM cards work and you are stuck without any money. I recommend having a stash of $200 USD for emergency situations. I don’t carry this money around but leave it in my hotel room safe in case something happens. It will be useful if you get robbed or lose your wallet.

8. Have Backup Credit and Bank Cards

I always keep one backup credit card and bank card with me in case of emergencies. You never know when one bank might decide to lock your account for suspicious activity without telling you (yes, that has also happened to me) or when you might get robbed. I recently had my bank account information stolen while I was traveling in Europe. My bank had to deactivate my card, and if I hadn’t had a second one with me, I wouldn’t have had access to any money.

Here are some helpful blog posts on credit cards and banking for you:

9. Make Copies of Your Passport and Important Documents

Keeping copies of your documents can come in handy during an emergency, especially if you lose your originals. If you get robbed or lose your passport, having copies ready for officials can make filing police reports and obtaining new documents much easier. When I lost my passport, my backup copies helped with my police report and served as my proof of identity at the American embassy. Copy your passport, your health/travel insurance paperwork, and your credit cards.

10. Carry a List of Emergency Contacts

If something happens to you, having a list of emergency numbers on you will help medical professionals know who to contact. I also keep a list of my allergies with me so if I need treatment and can’t answer questions, doctors know what I’m allergic to.

I keep two copies: one with me and one in my bag in my hotel room. Because having backups are important!

11. Have Travel Insurance

The ultimate form of preparedness, having travel insurance will be a blessing when you have to go to the hospital because you popped an eardrum scuba diving, get sick on the road, or break a leg. Chances are nothing is going to happen to you while traveling, but for when it does, you are going to want to have insurance. Only a fool travels without it.

Here’s a list of suggested articles on how to pick the best travel insurance:

12. Read Before You Go

There’s nothing more important than knowing about the place you’re visiting. Head to a library or bookstore and get a few books on what life is like where you’re going. If someone came into your home and ignored all your rules, you would get upset — the same guidelines are applicable when you travel overseas. Knowing basic rules and etiquette can help you avoid any misunderstandings and leave a favorable impression in your host’s minds. Otherwise, you could end up like this British couple who were jailed for kissing in public in Dubai. (That’s a big no-no in Middle Eastern countries.)

***

You never know when you might face the unexpected, and if there’s one thing I’ve learned from my years of traveling, it’s that even the best-laid plans can go awry. You may not use these items all the time, and, hopefully, you won’t ever need some of them, but the point is to be ready when you do. After all, a scout is always prepared.

How to Travel the World on $50 a Day

how to travel the world on $50 a dayMy New York Times best-selling paperback guide to world travel will teach you how to master the art of travel save money, get off the beaten path, and have a more local, richer travel experiences.

Click here to learn more about the book and pick up a copy today!

Book Your Trip: Logistical Tips and Tricks

Book Your Flight
Find a cheap flight by using Skyscanner or Momondo. They are my two favorite search engines because they search websites and airlines around the globe so you always know no stone is left unturned.

Book Your Accommodation
You can book your hostel with Hostelworld as they have the largest inventory. If you want to stay somewhere other than a hostel, use Booking.com as they consistently return the cheapest rates for guesthouses and cheap hotels. I use them all the time.

Don’t Forget Travel Insurance
Travel insurance will protect you against illness, injury, theft, and cancellations. It’s comprehensive protection in case anything goes wrong. I never go on a trip without it as I’ve had to use it many times in the past. I’ve been using World Nomads for ten years. My favorite companies that offer the best service and value are:

Looking for the best companies to save money with?
Check out my resource page for the best companies to use when you travel! I list all the ones I use to save money when I travel – and that will save you time and money too!

Do You Need Medical Evacuation Insurance?

A commercial airplane flying in a dark sky

While most budget travelers are content with a standard travel insurance package, today I wanted to talk about one specific aspect that I get asked about a lot: buying extra medical evacuation insurance.

When I first started roaming the world, I assumed that standard travel insurance would cover the cost of getting back home should I get injured abroad. Isn’t that what their “medical evacuation” coverage does?

I was shocked to discover that, more often than not, that isn’t the case.

Turns out, just because you get injured and require medical transportation doesn’t mean you get sent home.

If you read the fine print, most travel insurance companies only cover your medical transport to the “best” medical facility near where you are. This is what they call the “nearest acceptable facility.”

They decide where you go, not you.

They decide what the best facility is.

They decide what is suitable.

And once your travel insurance company sends you to a hospital, they have fulfilled their obligation to you. That means that if you’re not sent home, you could be liable to then cover the cost of getting home — which can be a lot of money.

Now, this is not to say that “regular” travel insurance is bad. It just means that people think it covers a lot more than it does and are often upset when they find out otherwise. I mean, I love travel insurance (I never leave home without it), but it’s important to know its limitations. Always read the fine print!

This is where comprehensive medical evacuation insurance can come in handy in addition to your existing travel insurance plan.

What is Medical Evacuation Insurance?

First, let’s get one thing clear: Medical evacuation insurance is not the exact same thing as travel insurance (and vice versa).

Of course, travel insurance generally includes medical evacuation insurance, but travel insurance is specifically designed to protect travelers from financial loss in the event of trip interruptions and cancelations, as well as injuries while abroad.

Cut yourself on a rock while hiking? Travel insurance will help.

Baggage lost or delayed after a flight? Travel insurance will help.

Someone pickpocket your phone? Travel insurance will help.

For most travel and medical emergencies, travel insurance will suffice.

But where it often falls short is when you need to be repatriated.

Most travel insurance plans do include decent coverage for medical evacuation — but they only take you to the nearest facility that can handle your emergency. This means:

  • No guarantee of going home
  • No guarantee of going to the absolute best medical facility to assist you
  • No guarantee of someone on the ground to walk you through the process — you’re usually left to handle all of that on your own.

And for some people, that’s not good enough.

Why is Medical Evacuation Insurance So Important?

When I was stabbed in Colombia, I went to a local hospital. I was on my own, left to navigate the process with what little broken Spanish I knew. While I received basic medical care, it was not exactly the best in the world. I flew back to the US shortly after that to get the care I needed.

I was lucky that I didn’t require surgery and that I was able to handle the situation on my own. I didn’t necessarily need medical evacuation insurance for that incident.

But not everyone will be that lucky. Earthquakes, monsoons, hurricanes, floods, and fires do happen — and the list goes on.

Each and every year, 10 million travelers are hospitalized abroad — with over two million requiring medical transportation!
And should you need to be evacuated due to an injury, weather event, or political crisis, you definitely don’t want to be stuck with a pricey repatriation bill. After all, evacuation and transportation aren’t cheap. Costs for a medical evacuation or medical transfer can range from $30,000 to upwards of $200,000.

Yes, you read that right: $200,000!

Unless you have that kind of money lying around, you’ll want to make sure the insurance that you buy covers you for medical evacuation, transportation, transfers, and repatriation. You don’t want to be stranded at a foreign medical facility — especially if that facility doesn’t provide the degree of care that you need.

While these sorts of emergencies are rare, it’s much better to pay a small fee now than to risk going bankrupt because of an unexpected injury. Because $200,000 is a LOT of money!

Just as important as the financial argument for medical evacuation insurance is the fact that having comprehensive coverage gives you peace of mind. You and your loved ones can relax, knowing that, should the worst happen, you have a company there that is ready and able to help you get through it. The last thing you want on your vacation is to be fretting about the fine print on your insurance policy.

Over the past 10 years, I’ve had to deal with all sorts of hiccups on the road, from minor inconveniences, like a broken camera and lost baggage, to more serious situations, like when I burst my eardrum.

Take it from me: peace of mind is worth the price.

That’s why it’s important to be prepared.

That’s why more and more travelers are joining membership programs for comprehensive medical evacuation insurance.

Our Recommended Company

Medjet is a membership program that offers comprehensive medical transportation services all around the globe. It has 50 dispatch stations worldwide, with access to over 250 air ambulances. That means that as long you’re not in a warzone or country prohibited to travel by the US State Department, you will be able to receive the medical transport coverage and evacuation services that you need.

Medjet focuses solely on medical evacuation coverage, making it the go-to company for travelers concerned about medical evacuation and repatriation. All the travel pros I know use it.

Where most insurance companies will just take you to the nearest medical facility, Medjet will make sure you get home.

Additionally, Medjet will:

  • Allow you to choose what hospital or medical facility you want to go to.
  • Arrange medical transfer (regardless of medical necessity).
  • Provide service both within the US and abroad.
  • Initiate a security response and evacuation even if there is no government warning to do so.

However, it is also extremely affordable — I’m still a budget traveler after all! Medjet offers both short-term and annual plans. An annual membership can cost as little as $295 USD per year, which is amazing value if you’re an avid traveler.

If you’re looking for coverage that goes above and beyond what most companies offer, you’ll want to consider Medjet — especially if you’re concerned about the cost of a medical evacuation.

It’s also the perfect choice for anyone looking to do adventurous activities or travelers who are heading into a region where extreme weather events (such as hurricanes or floods), fires, or earthquakes are common.

***

Nobody likes to imagine something going wrong on their trip. But accidents and emergencies do happen. Make sure you have the evacuation insurance coverage you need on your next trip. You won’t regret it!

Book Your Trip: Logistical Tips and Tricks

Book Your Flight
Find a cheap flight by using Skyscanner or Momondo. They are my two favorite search engines because they search websites and airlines around the globe so you always know no stone is left unturned.

Book Your Accommodation
You can book your hostel with Hostelworld as they have the largest inventory. If you want to stay somewhere other than a hostel, use Booking.com as they consistently return the cheapest rates for guesthouses and cheap hotels. I use them all the time.

Don’t Forget Travel Insurance
Travel insurance will protect you against illness, injury, theft, and cancellations. It’s comprehensive protection in case anything goes wrong. I never go on a trip without it as I’ve had to use it many times in the past. I’ve been using World Nomads for ten years. My favorite companies that offer the best service and value are:

Looking for the best companies to save money with?
Check out my resource page for the best companies to use when you travel! I list all the ones I use to save money when I travel – and that will save you time and money too!

FLYTE Update: Here’s What Happened to the Students We Sent to Colombia

the FLYTE students on a field trip in Colombia standing in front of a yellow church

When I started my nonprofit Foundation for Learning and Youth Travel Education (FLYTE), my goal was to make international travel accessible to low-income youth across the country, who are incredibly passionate and smart but would never have the opportunity to travel abroad otherwise.

Earlier this year, we raised $15,000 to send a group of kids from Envision Academy to Colombia.

Located in Oakland California, Envision Academy uses an innovative project-based learning model to ensure that its students — the majority of whom live below the poverty line — are ready for post-secondary education and beyond. (Most are first-generation immigrants and will be the first in their family to go to college.)

Last month, they returned from their exciting trip to the country so I wanted to share some of what they did and learned, so you can see what your support accomplished. For most of the students, it was their first time in another country and, needless to say, it had a big impact on them.

Our group started in Bogotá, where they climbed to the top of Cerro de Monserrate and explored Plaza Bolívar, where Jeremy, the teacher leading the trip, gave a cross-curricular lecture about Simon Bolívar, Colombia’s history during the drug cartel years, and the architecture around them. They also went on a street art tour led by two local artists, on which they learned all about art techniques and the political climate that prompted many of the pieces that they saw.

the FLYTE students enjoying a street art tour in Colombia

The students immediately started seeing commonalities between Oakland and Colombia. Darrilyn, a fifteen year old sophomore, remarked that this trip, her first time out of the country, “changed my perceptions and preconceived notions of Colombia a lot, and I saw that it’s more like home than I previously thought.” She also “really enjoyed this walking tour because I like art and I like graffiti because it’s unconventional art and it tells the story of a person.”

Afterward, the group headed to Cartagena. They got a perfect intro to the city on a walking tour through our partner, Context Travel, during which they learned a lot about Cartagena’s history as a port for enslaved people. This resonated with the students, who stressed how important it was for more people to have this knowledge. Kai, whose new passport got its first stamp on this trip, had the realization that “when people think about Latin America, they often don’t think about people of African descent.”

the FLYTE students on a tour around Cartagena with Context Tours

Myani, who’s 17 and just graduated from Envision Academy, was equally moved: “It’s inspiring in a way because even though our ancestors were enslaved, they made the city what it is. You can see their value to the community. Even though there’s an oppressive connotation, because they were enslaved, flip it and make it a powerful lesson. Make it your own: My ancestors built this city.”

On top of all this, the students immersed themselves in Colombian cuisine by taking a street food tour with Cartagena Connections. They tried everything from ajiaco and arepas to bandeja paisa, mango biche, and a bubble gum soda.

One of the highlights of the trip was visiting Cartagena’s Barrio San Francisco with Alex Rocha from Experience Real Cartagena, whose tours are designed to make deeper connections with the marginalized communities of Colombia. (Alex’s company also operates as a social enterprise, and so the proceeds fund an after-school program for the local community.) Our students had an opportunity to connect with some of these youth through activities like drawing, dancing, and soccer, as well as through honest conversations about their shared experiences.

the FLYTE students in Colombia

Aliza, a sophomore and president of the student council who had never left the US before, felt that this was the highlight of her trip because she was able to “see the kids and understand their environment and how they live every day.” Jany, who is seventeen and served as the de-facto translator for our Spanish-speaking parents, reflected on how the kids she met “make the best out of what they have. They’re grateful and humble and always try to find something positive.”

Tayvion, a 14-year-old who also was traveling abroad for the first time, had a deep conversation with one of the Colombian kids about police brutality. When Tayvion asked if they had guns, his new friend replied, “Yes, but they never shoot.” Having drawn parallels and distinctions with his own community, Tayvion shared his devastating realization: “It made me think about how, for officers in the U.S., their first instinct is just to shoot.” (To me, that’s a sad statement coming from a kid and just shows you up much police violence is an everyday fact for many people in this country.)

the FLYTE students on a walking tour in Colombia

Throughout this entire journey, the group took part in daily reflections. They shared their experiences, learned from one another, and bonded over how they’d changed throughout the trip.

Joshua, a sophomore who had never even left California before this trip, said that the biggest lessons he’d learned were: “Do not take the things you have for granted. Do not be afraid to try new things. Finally, don’t be scared to learn about new people.”

For Wald, a soon to be junior, reflected that on how “we should be open-minded about other cultures and people ’cause we might find some similarities between us and them. We shouldn’t judge a people or culture based on their past alone.”

the FLYTE students on a walking tour in Colombia

These new experiences not only shifted their mindset, but they also made the students think about their future and goals. Yasmeen told us, “I have a lot of dreams. There are so many benefits in the US, and I’m not going to waste my time. I should travel more and learn about different cultures.”

In addition to the knowledge that she gained, Veronica shared that her “goals are to help my community with any of the work that I do. I think this trip is going to help me achieve that because I’ve realized how similar my community is with the community of Cartagena. We can use other cities from different countries to help each other with the issues we are going through.”

Similarly, Ronald, a student who was excited to relay his experiences with his stepmom (who’s from Colombia), shared that “this trip made me open-minded to different cultures and makes me propose solidarity within communities in Oakland.”

And, in a quote I especially love, Darrilyn said of her time in Colombia: “My hopes and dreams are to be a political analyst and to travel the world. This trip showed me there is no fear to travel.”

This is why FLYTE exists: to create moments and lessons like this for students so they can see the world outside their borders and dream big.

the FLYTE students at the airport leaving for Colombia

The experiences these students had in Colombia left an indelible mark on them. Most of them had never been on a plane before their trip to Colombia. Not only did they learn about the culture and history of another country but they also discovered how a community can rise up in times of adversity.

On the last days of their trip, the students started planning how they’re going to take action back home. One of their ideas was to create a mural, much like the ones they saw in Colombia, to educate others about how Oakland continues to overcome its struggles.

Because of this trip, these youth now have a bigger understanding of the world and the power they each have to change it for the better.

***

And, so, our mission continues!

I want to thank you for helping make this happen! It takes an entire network of passionate individuals and businesses to run one of these trips, and we wanted to celebrate some of our partners who made this trip such an unforgettable experience for our students:

  • World Nomads, which donated all of our travel insurance. Knowing that they had us covered for any unforeseen circumstances, like lost luggage, gave us such peace of mind.
  • Selian Hostel in Cartegena for providing tours and breakfast for the students free of charge.
  • Javier from MYGHT travel, who made the daunting process of booking flights for a group of 20+ a seamless and stress-free experience.
  • Context Travel, which worked with us to craft unique, immersive experiences (at a discount!) for our students.
  • Alex Rocha from Experience Real Cartagena for opening up his community to us and providing us with a deep connection to the amazing people of Barrio San Francisco.
  • Bluffworks, one of our newest corporate partners, which covered the costs of three students to take this journey of a lifetime.
  • Allyson and the team from wikiHow, who highlighted us on their platform and sponsored one student on this trip.
  • The International TEFL Academy, for donating 50% of the proceeds from its Teach Abroad Film Festival to FLYTE.
  • Lo & Sons, for matching donations during our wildly successful #GivingTuesday campaign and sharing our story with their audience.
  • Lia from Practical Wanderlust, who paid her own way to join the trip and captured so many incredible photos and videos. She was also the mastermind behind FLYTE’s IG stories during the trip! We love how she was able to document the students’ experience in such an authentic, powerful, and unintrusive way.

Last, but certainly not least, many thanks to the thousands of you that donated to FLYTE. Your generosity over the years has sent 70 students on life-changing journeys abroad. The impact of these trips extends beyond just these youth. Because of you, the wave of positive change will ripple through their communities and the world at large. With them taking the lead, I know without a doubt that our future is bright. Thank you all for making such an immeasurable impact!

As the world builds walls, we’re helping tear them down and showing a new generation that there is more that brings us together than tears us apart.

If you want to learn more about FLYTE and how you can help send more students abroad, click here for more information.

Book Your Trip: Logistical Tips and Tricks

Book Your Flight
Find a cheap flight by using Skyscanner or Momondo. They are my two favorite search engines because they search websites and airlines around the globe so you always know no stone is left unturned.

Book Your Accommodation
You can book your hostel with Hostelworld as they have the largest inventory. If you want to stay somewhere other than a hostel, use Booking.com as they consistently return the cheapest rates for guesthouses and cheap hotels. I use them all the time.

Don’t Forget Travel Insurance
Travel insurance will protect you against illness, injury, theft, and cancellations. It’s comprehensive protection in case anything goes wrong. I never go on a trip without it as I’ve had to use it many times in the past. I’ve been using World Nomads for ten years. My favorite companies that offer the best service and value are:

Looking for the best companies to save money with?
Check out my resource page for the best companies to use when you travel! I list all the ones I use to save money when I travel – and that will save you time and money too!

Photo Credit: All photos belong to Lia from Practical Wanderlust who was there helping document the trip!

The Complete Guide to Diving in Koh Tao

Alex in Wanderland diving in the waters near Koh Tao, ThailandUpdated: 8/22/2019 | August 22nd, 2019

This is a guest post by Alexandra Baackes, the legend behind Alex in Wanderland. She’s also a PADI divemaster and a resident of Koh Tao, Thailand. Koh Tao is a popular destination for scuba divers and one the the biggiest places people learn in the world! In this guide, Alex gives you the insider scoop on diving schools, prices, and the best areas for viewing sea life when you visit Koh Tao.

Travelers in Thailand like to label their destinations neatly. Intricate island paradises are boiled down to one or two simple words or associations: Koh Phi Phi? The Beach. Koh Phangan? The Full Moon Party. Koh Tao? Diving.

Some of them are fairly well deserved.

After all, Koh Tao is one of the world’s top destinations when it comes to number of annual dive certifications issued — in fact, it’s second only to Cairns, Australia. Travelers flock from across Southeast Asia to take their first breaths underwater in the coral reefs fringing this paradise island. It’s simple to see why: the courses are among the most affordable in the world, the teaching standards are high, the conditions are easy, the dive sites are abundant, and it’s a dang fun place to decompress after a day underwater.

It’s easy to be overwhelmed when planning a trip to Koh Tao — there are more than 70 dive schools on the island! — so a bit of research goes a long way when it comes to such a large investment of your time and travel budget.

PADI or SSI?

A massive shark swimming above a diver in the waters near Koh Tao, Thailand
There are more than 50 scuba diving training systems around the world, but in Koh Tao, the choice generally comes down to two: the Professional Association of Dive Instructors (PADI) or Scuba Schools International (SSI). Each organization develops its own teaching materials; writes its own standards based on those set by the umbrella organization, the World Recreational Scuba Training Council (WRSTC); and awards its own certifications.

No matter what certification card you walk away with, you’ll use the same equipment, see the same fish, and be able to dive at the same destinations. Certifications are interchangeable and recognized worldwide. The most important factors in the quality of your course will be your dive school and your dive instructor. But there are minor differences between agencies.

PADI
PADI is the world’s leading scuba diving training organization. If you find comfort in numbers, then
this agency with nearly one million certifications per year might just be for you! The major benefit to diving with PADI comes at the professional level. For instructors and divemasters, PADI provides the most employment opportunities, and PADI instructors can work independently (while an SSI instructor must teach through an SSI-registered shop). So if you have dreams of staying in Thailand to teach the backpacker masses and you want to be loyal to one agency, PADI is a strong agency to hedge your bets on.

SSI
Once just a small subset of the diving industry here, SSI has exploded to control a full 50% of the market share on Koh Tao. The benefit of doing an SSI certification comes down to best bang for your baht, as an SSI course will typically cost you nearly 10% less than a PADI course. If you’re coming to Koh Tao specifically for its status as one of the world’s cheapest places to get certified, those extra baht can make a big difference. Plus, all coursework is done via the free app and/or online, making it a green choice.

What’s the Course Like?

Alex in Wanderland diving in the water with a groupd of friends near Koh Tao, Thailand
The Open Water course is the first certification you’ll complete as a diver. Many divers come to Koh Tao to complete their Open Water certification, and some get hooked and stay till they’re instructors themselves. But be wary of “zero to hero” packages that include the full array of courses from first underwater breath to master scuba diver trainer — take it one step at a time.

(While half-day experiences called “Discover Scuba Diving” or “Try Scuba Diving” are available, they don’t lead to any sort of certification and should really only be considered if you’re (a) super strapped for time or (b) extremely unsure if diving is for you. Otherwise, just dive in, literally, to the Open Water!)

The typical Open Water diving course is completed in three to four days. There are videos to watch, book chapters to read, tests to take, and, of course, dive sites to explore! It might sound intimidating, but the course is designed for students as young as 10 — the academics shouldn’t intimidate you.

Here’s a rough outline of what your course will look like:

  • Day 1: Orientation, paperwork, and videos.
  • Day 2: A morning in the classroom learning about basics skills, equipment, and the effects of diving on the body. An afternoon spent in the pool or at shallow dive sites working on skills such as regulator recovery and mask removal, among others.
  • Day 3: A morning in the classroom finishing knowledge reviews and taking some quizzes. In the afternoon, the fun really begins with open-water dives 1 and 2, which will stay shallow and low-key. Some skills will be practiced during the dives.
  • Day 4: You’ll go out on a morning boat and complete open-water dives 3 and 4, where you’ll get to go a bit deeper and explore. In the afternoon, you’ll take the final exam. Congratulations — you made it!

Upon completion, you’ll receive a certificate that allows you to dive anywhere in the world with another certified buddy, independent of a professional, to a depth of 18 meters.

And the Open Water course is just the beginning! Koh Tao is a true mecca for dive education: you can take courses in freediving and technical diving, and specialty scuba courses in everything from photography to conservation and beyond — plus the gamut of continuing and professional courses up to Instructor Trainer!

Which School Should I Choose?

A massive school of long fish in the waters of Koh Tao, Thailand
Koh Tao ain’t called a mecca for diving for nothing: there are nearly 70 dive schools on this 13-square-mile rock! This decision is the biggest when it comes to determining the quality of your diving course. For the most part, the schools fall into a few categories:

Big schools: Bans, Big Blue, Crystal
These schools are enormous scuba powerhouse resorts that can churn out hundreds of Open Water divers a week, with instructors for almost every language imaginable. They are ideal for someone who is confident about going under water (i.e., doesn’t need extra individual attention) and wants to make lots of friends and meet people in a big group setting. However, those groups can be a bit large for comfort.

Medium-sized schools: Master Divers, Sairee Cottage
Medium dive schools generally have the best of both worlds. They have a range of instructors and groups large enough to make friends in, but they aren’t as prone to overcrowding or rushing through the course.

Small schools: Hydronauts, Ocean Sound
These schools are great at accommodating special needs or focusing on a certain specialty. The extra attention with instructors is key for those who are feeling uncertain about heading underwater or who simply want to be spoiled with attention and learn in a more focused environment. However, these schools sometimes rent boat space and pool time from other dive schools rather than having their own facilities.

When picking a school and an instructor, consider these factors:

  • Does it have an instructor who speaks your language? There are many specialty language-focused dive schools on Koh Tao: for Spanish, head to Pura Vida or La Bambona; for French, French Kiss Divers; for Finnish, Koh Tao Divers.
  • Will the confined dives take place in the ocean or in a pool?
  • How many students will be in the group?
  • What time do they leave in the morning? Those eager beavers who want to be the first on the dive site might not mind being up in time for New Way’s 6am departure, while night owls might prefer Ban’s or Sairee Cottage’s more relaxed dive times.
  • Is the equipment up to date and in my size? Schools in Koh Tao have a good record for equipment range and maintenance, but it never hurts to ask.
  • Will you get to have my own dive computer throughout the course? Will there be an extra charge?
  • How qualified is the instructor? Some students may appreciate the enthusiasm and up-to-date training of a new instructor, while others may find comfort in a teacher with tons of qualifications and years of experience.
  • Do you like the instructor?

How Much Will It Cost?

Alex in Wanderland posing for a photo on Koh Tao, Thailand
Open Water courses on Koh Tao range from 9,200 to 10,800 baht ($300–350 USD) — without accommodation. (Once upon a time, almost every dive school on the island bundled accommodation in with their courses, but that’s becoming more and rarer outside the largest dive resorts. If accommodation is included, it’s a very basic fan room — or you can upgrade to a nicer one at a discount.)

Though it’s less common these days, many schools will have a videographer come along on dives 3 and 4 and make a 10-20-minute music video–style recording of your day. At night, the class will gather to watch it. Depending on the video company, they may charge you a flat rate for a copy or base it on how many copies are sold — so you can take one home for anywhere from 1,000 to 3,000 baht ($32–97 USD). Some schools have switched to providing still photos instead, which you can purchase as part of a package — expect to pay around 300 baht ($10 USD) for one photo or 1,000 ($32 USD) for a set of several.

Though it’s not an agency standard, many schools have a policy that students can’t bring their own cameras out on Open Water Courses, so don’t freak if you aren’t allowed to bring your GoPro — they aren’t trying to bully you into buying a video or photo package; they are trying to keep you safe, keep you focused, and avoid damage to reefs and marine life until buoyancy is mastered.

For divers who have already completed their Open Water course, fun dives cost around 700–1,000 baht ($23–32 USD) each, depending on how many dives you’ll do and if you have your own equipment. Those with time and money constraints will want to make it a priority to visit at least one of Koh Tao’s premier dive sites.

What are the Can’t-Miss Dive Sites?

Alex in Wanderland leaping into the water to start a dive in Thailand
If you’re a brand new diver doing your Open Water course on Koh Tao, quite frankly, it doesn’t matter where you go — you’re going to love it! You’ll be so focused on your skills and the magic of breathing underwater for the first time, you won’t really notice the differences between different dive sites yet anyway.

Twins
Twins is a very common training dive site used for dives 1 or 2 of the Open Water course. Twins sits just off the coast of Koh Nang Yuan and is perfect for new divers, thanks to its shallow depth. A highlight here is the family of rare saddleback clownfish inside an anemone that you can’t miss — there’s a ring of rocks around it!

White Rock
White Rock is another one of the most commonly visited dive sites on Koh Tao, frequently for dive 4 of the Open Water course. It’s an enormous dive site, providing a wide sampling of Koh Tao’s marine life — including the odd sea turtle who lumbers through. Read more about diving White Rock here.

Southwest
Southwest is a collection of pinnacles carpeted in soft coral anemone and
the pink anemonefish that accompany them. This is a great site for spotting barracuda and giant groupers. It’s located 13km southwest of Koh Tao and is almost always visited on the morning boats. With pinnacle depths from 6m to 27m, it’s perfect for anyone from Open Water certified and up. (Feeling adventurous? There’s a secret pinnacle here as well.) Read more about diving Southwest here.

Shark Island
Shark Island is so named for its resemblance to a dorsal fin, rather than an abundance of certain toothy fish. The north side is best known for its diversity of coral, while the south side has unique soft corals you won’t see elsewhere on Koh Tao. The rocky outcrop is located southeast of Koh Tao and is a less commonly visited site due to both its location and its often challenging conditions — both current and visibility can be a struggle here. Read more about diving Shark Island here.

HTMS Sattakut
This former US Navy ship was sunk in June 2011 off the coast of Sairee Beach and has become home to Jenkins’ whiprays, great barracuda, and dozens of gobies playing hide-and-seek in rusty crevices. The wreck doesn’t start until about 18m and sits down at 30m, so you really need to be Advanced Open Water certified or do a Deep Adventure Dive to enjoy it fully. To penetrate, you must have or be training for a wreck specialty.

One of the HTMS Sattakut’s greatest assets is its location less than 15m from neighboring dive site Hin Pee Wee. So you can compliment a spin around
the wreck with a zip around the coral reef. Hin Pee Wee features several pinnacles, a resident turtle, and some impressive macro life. Read more about diving the HTMS Sattakut here.

Chumphon
Chumphon is a submerged granite pinnacle covered in colorful sea anemone and surrounded by large schools of trevally, batfish, and barracuda. Lucky divers will spot giant groupers, pompanos, and even whale sharks. Due to its depth, this is a dive site best enjoyed by Advanced Open Water students.

Chumphon is almost always visited on the morning boats. Due to the distance — it’s 11km from Koh Tao — and the size of this dive site, some schools schedule two dives in a row here. Read more about diving Chumphon here.

Sail Rock
Sail Rock is considered the premier dive site in the Gulf of Thailand. Don’t miss “the chimney,” a beloved, not-so-secret swim-through, and a deeper secondary pinnacle east of the main rock. This granite, deep-ocean pinnacle rises from 30m and breaches the surface, a welcome sight after the two-hour boat ride from Koh Tao.

Occasionally, you can get lucky and complete dives 3 and 4 of your open water here for an extra fee, though generally, this is a specialty trip costing anywhere from 2,500 to 3,500 baht ($81–113 USD) and including three dives, breakfast, lunch, and a beer on the way back. A handful of schools take trips to Sail Rock but most only go once a week, so plan accordingly. Read more about diving Sail Rock here.

When to Dive on Koh Tao

A colorful school f fish in the waters of Koh Tao, Thailand
Most island divemasters agree that April and May are the best months — they’re warm and clear, and the sea is flat. And in recent years, they’ve been chock full of whale shark sightings! Plus you could time your trip to spend Songkran (Thai New Year’s) on Koh Tao (mid-April).

That said, there isn’t really a bad time to dive on Koh Tao, outside of November and December, when winds and can be high and the weather can be dicey, causing boat rides to be unpleasant and visibility to be poor.

***

Learning to dive on Koh Tao should be approached with caution, as it can lead to a very serious addiction to the diving hobby and lifestyle! Many a dive virgin has arrived by ferry with plans to stay a few days and get certified, only to find themselves months later calling the island home and working toward becoming a scuba diving instructor.

Alexandra Baackes is the author of The Wanderland Guide to Koh Tao (which is an incredible guide to the island! and founder of Wander Women Retreats, which hosts an annual women’s dive and yoga retreat on Koh Tao. She overshares about travel, diving, and life as an entrepreneur on her blog Alex in Wanderland and on her Instagram @alexinwanderland.

Book Your Trip to Thailand: Logistical Tips and Tricks

Book Your Flight
Find a cheap flight by using Skyscanner or Momondo. They are my two favorite search engines because they search websites and airlines around the globe so you always know no stone is left unturned.

Book Your Accommodation
You can book your hostel with Hostelworld. If you want to stay somewhere other than a hostel, use Booking.com as they consistently return the cheapest rates for guesthouses and cheap hotels. I use them all the time. My favorite places to stay are:

  • The Dearly Koh Tao Hostel – The eco-friendly hostel offers a bar, cafe, restaurant, pool, and rooftop terrace. It’s a great place to relax and connect with other travelers.
  • Gecko Republic Jungle Hostel – You’ll be hard pressed to find a cleaner hostel with staff as friendly as those that work at Gecko. It’s easy to meet people here and there is AC available too!

Don’t Forget Travel Insurance
Travel insurance will protect you against illness, injury, theft, and cancellations. It’s comprehensive protection in case anything goes wrong. I never go on a trip without it as I’ve had to use it many times in the past. I’ve been using World Nomads for ten years. My favorite companies that offer the best service and value are:

Looking for the best companies to save money with?
Check out my resource page for the best companies to use when you travel! I list all the ones I use to save money when I travel – and I think will help you too!

Want More Information on Thailand?
Be sure to visit our robust destination guide on Thailand for even more planning tips!

The post The Complete Guide to Diving in Koh Tao appeared first on Nomadic Matt's Travel Site.